Your wet and dry vacuum cleaner is designed to handle tough jobs, but its performance relies on one key component: the filter.
Over time, filters naturally fill up with dirt and fine particles. When that happens, performance drops, the motor works harder than it should, and dust may even escape back into the air. Regular filter maintenance is one of the simplest ways to keep your wet and dry vacuum cleaner running efficiently.
When Is It Time to Replace the Filter?
One of the most common signs of a filter that needs to be replaced is reduced suction. If your wet and dry vacuum cleaner no longer picks up debris as effectively—even when the container isn’t full—the filter is often the cause. A clogged filter restricts airflow, which forces the motor to work harder while delivering weaker cleaning results.
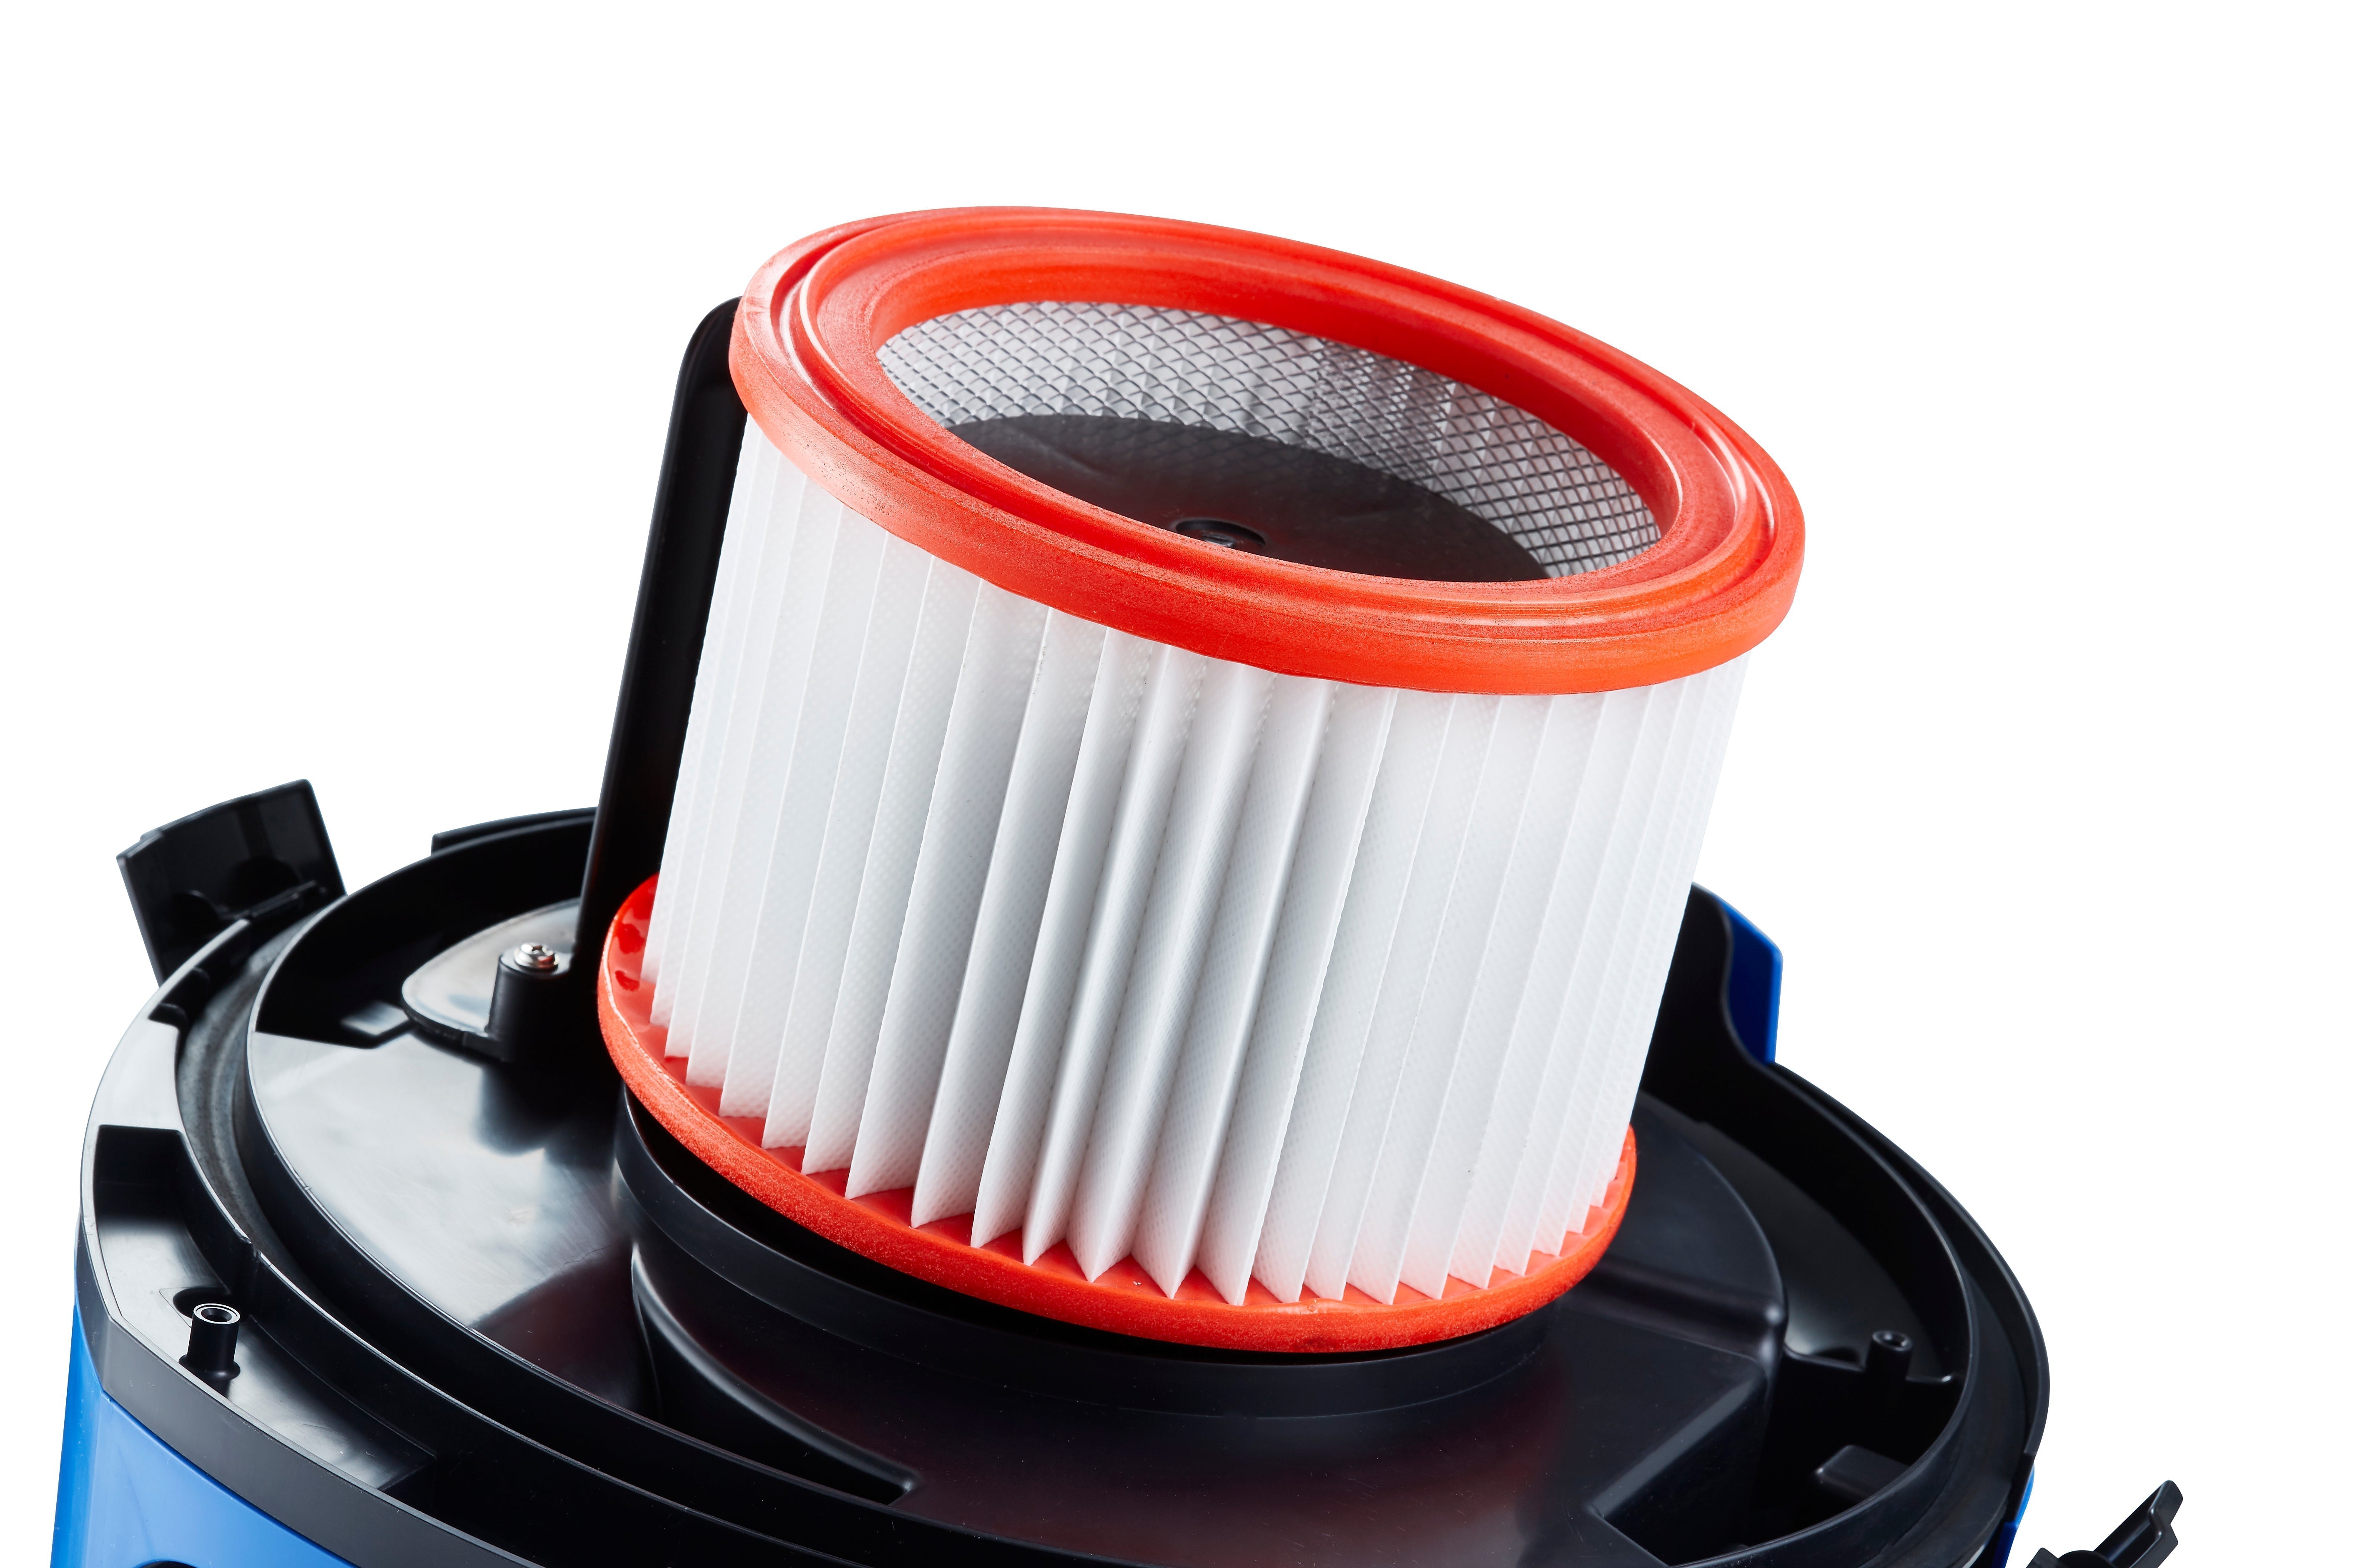
Visual signs are another clear indicator. Filters that appear dark, dusty, or heavily coated with fine particles are no longer able to trap debris efficiently.
In some cases, you may also notice high pitched motor noises from the exhaust—a sign that airflow is compromised.
Smells can also point to filter issues. Dust, hair, and moisture can build up inside the filter and lead to unpleasant odors that spread every time the machine is switched on. A clean filter helps eliminate these smells and keeps the cleaning process more hygienic.
Keeping a spare filter on hand makes maintenance easy and ensures your wet and dry vacuum cleaner is always ready when you need it.
How to Change the Filter
Replacing the filter on a wet and dry vacuum cleaner is a simple task that only takes a few minutes.
- Start by switching off the machine.
- Open the vacuum lid to access the filter compartment, then unscrew the filter stopper and remove the used filter.
- Insert the new filter, secure it with the stopper, and close the lid.
- Once everything is properly in place, your machine is ready to use again.
Using the Filter for Liquid Vacuuming
Filters used in wet and dry vacuum cleaners are suitable for both liquid and dry applications. However, after vacuuming liquids, you can advantageously remove the filter and let it air dry completely before switching back to dry dust. Using a damp filter for dry vacuuming causes dust to mix with moisture, turning into a thick residue that quickly clogs the filter.
Push & Clean: Maintaining Suction During Use
Some wet and dry vacuum cleaners are equipped with a Push & Clean system, a feature designed to restore suction without opening the machine. As fine dust accumulates on the filter, an indicator alerts you that it’s time to activate the function.
To use Push & Clean, block the air inlet or suction hose with your hand, then press the Push & Clean button 2-3 times. This creates a reverse air pulse that forces dust and debris off the inside of the filter and into the container below. It’s an effective way to maintain performance while you work.
However, even with this system, filters don’t last forever. Over time, the filter will eventually need to be replaced to maintain reliable performance.

Keep Your Wet and Dry Vacuum Performing at Its Best
Regular filter care is essential for getting the best out of your wet and dry vacuum cleaner. By checking the filter frequently and replacing it when needed, you protect the motor, maintain strong suction, and ensure dust and debris stay where they belong—inside the machine.
A small maintenance habit that helps your wet and dry vacuum cleaner deliver powerful performance for years to come.