News
News

“Which?” Asked a Pressure Washer Expert — Here Are 5 Mistakes You Might Be Making
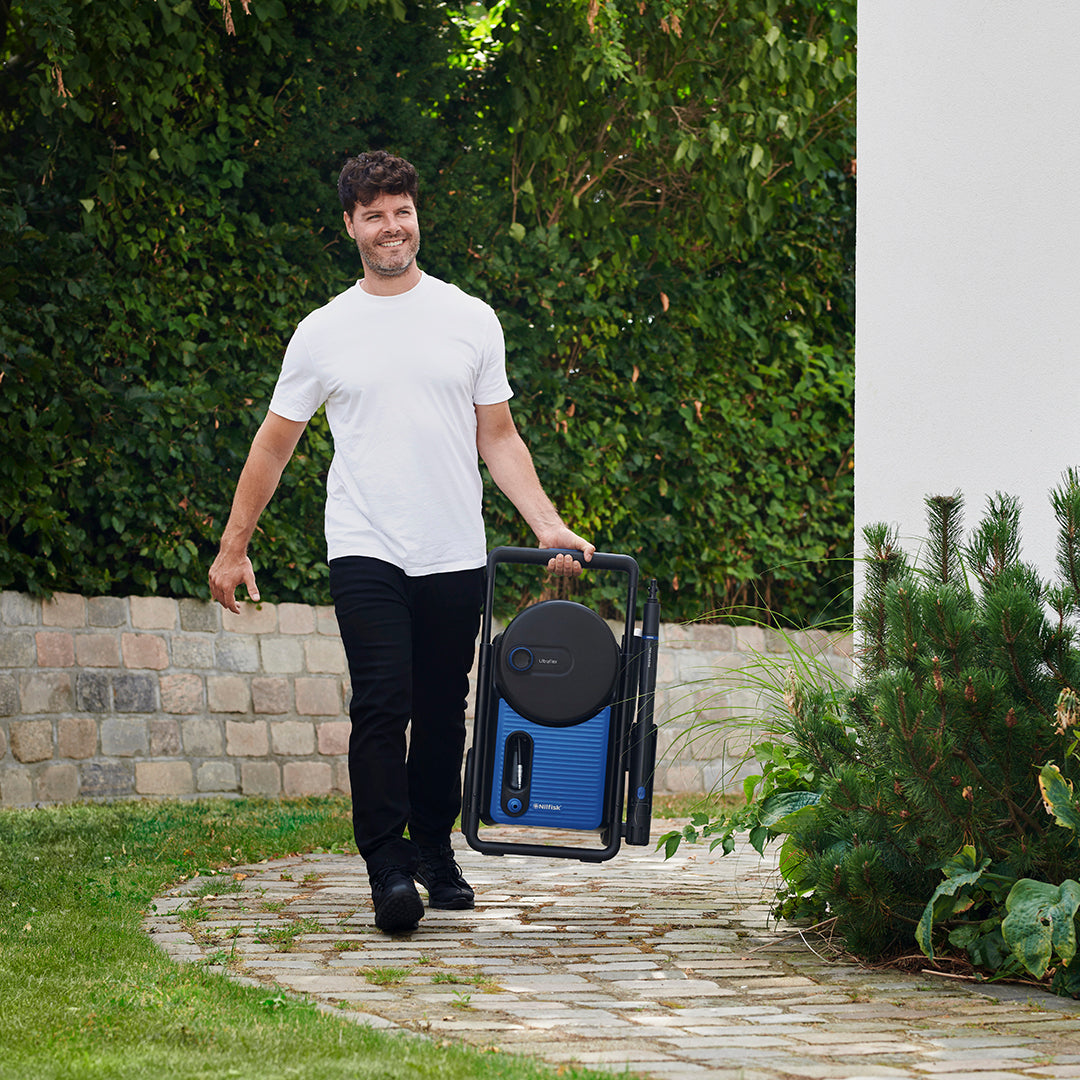
“Which?” — the UK's most trusted independent consumer testing organization — recently used a Nilfisk high-pressure washer to demonstrate what separates a pressure washing expert from everyone else. Five things you should never do, straight from the people who test these machines for a living. Watch the full reel on Instagram or Facebook. 1. Never Use Full Power on Delicate Surfaces Wooden decking, garden furniture and painted fences all need a gentler approach. Using maximum pressure does not necessarily clean better — in fact, it can damage the surface by splintering wood fibres, stripping paint or leaving marks. For more delicate jobs, choose a gentler nozzle designed for your pressure washer. Nilfisk offers soft cleaning nozzles for both Click & Clean machines and Premium models, helping you clean effectively while reducing the risk of damage. 2. Never Wash Your Car on Gravel It might seem convenient to wash your car wherever it is parked, but gravel is one of the worst surfaces for car cleaning. A high-pressure jet can pick up loose stones and send them flying towards the paintwork, causing chips, scratches or other damage. To help protect your car, always wash it on a hard, stable surface such as concrete. Read our blog post for a step-by-step guide to washing your car with a high-pressure washer. 3. Never Rest Lances on Muddy Ground When you are in the middle of cleaning, putting the lance down on the ground can feel like the easiest option. But if the surface is muddy or dirty, grit and debris can get into the nozzle. This can clog the lance, reduce pressure and, over time, potentially affect the performance of your machine. Instead, use the lance holder on your pressure washer or place the lance on a clean, hard surface. If debris does get into the lance, many Nilfisk high-pressure washers include a cleaning pin designed to clear the small nozzle opening and help restore proper water flow. 4. Never Leave Your Pressure Washer in the Shed Over Winter Leaving a pressure washer in an unheated shed or garage during winter is one of the most common mistakes owners make. Any water left inside the pump, hose or seals can freeze, expand and damage internal components. To help prevent this, always drain the water from your machine before storing it and keep it somewhere protected from freezing temperatures. Read our blog post for a complete guide to storing your high-pressure washer during winter. 5. Never Use a Kinked Hose A kinked hose restricts the water flow going into the machine. When less water reaches the pressure washer, the output pressure can drop and the machine may have to work harder than necessary. Before switching on your pressure washer, check the full length of the hose and straighten out any twists or kinks. Small Habits, Better Results These simple habits can make a real difference — not only to your cleaning results, but also to the lifespan of your machine. You can read Which?'s full pressure washer reviews and buying guide here, including independent test scores for Nilfisk models. Are you ready to find your perfect match? Explore the Nilfisk pressure washer range.

How to Wash Vacuum Cleaner Filters
A clean filter helps your vacuum keep strong suction, improves airflow, and can reduce dust and allergens that get pushed back into your home. The good news: many filters are designed to be washed a few times before you replace them—saving you money and keeping your machine performing at its best. Before you start: Check your vacuum’s manual to confirm the filter is washable. Some filters are replace-only, and washing them can cause damage and reduce filtration. S1 and Move filters are washable, but always check the manual before cleaning. How to wash your vacuum cleaner filter? Power off and unplug the vacuum. If you’ve just used it, give the machine a few minutes to cool. Take out the filter. Open the filter cover and remove the filter. Knock off loose dust first. Tap it gently over a bin to remove dry debris—this makes rinsing more effective. Rinse under running water. Rinse the filter under cold water until the water runs clear. Never put it back in damp. Shake off excess water and leave the filter to air-dry completely before reinstalling. Reinsert and check performance. Once it’s fully dry, refit the filter, close the cover, and run the vacuum briefly to confirm normal airflow. How often should you wash/replace your vacuum cleaner filter? As a general rule, check your vacuum filter every 6–12 months (or sooner if you notice a drop in performance). Most washable filters can be cleaned and reused 2–3 times before they begin to wear out and should be replaced.If you have pets, lots of carpets, or allergies, you may need to clean and/or replace the filter more often. Drying tips Air-dry only: don’t use a heater or hair dryer. Leave it in a warm, well-ventilated area until it’s dry all the way through (not just on the surface). Plan ahead: many filters need at least 24 hours to fully dry. If you own a spare filter, swap it in while the washed one dries. Always let your filter dry completely before reinstalling; a damp filter can cause odors, lower suction, or damage the motor.With a rinse and proper drying, regular filter care keeps your vacuum running efficiently and your home air cleaner for longer!

Real Stories of Nilfisk Durability Across Generations
Anniversaries are a good moment to look back—not just at milestones on a timeline, but at the things that have consistently demonstrated their value over time. As part of our anniversary celebration, we invited people to share photos and stories of their oldest Nilfisk products. It was a simple prompt, but it turned into a meaningful reminder of what heritage really looks like: equipment that stays in use and becomes part of people’s routines. A Small Proof Point From 1912 Nilfisk has a long history of developing cleaning equipment with a focus on practical performance and long-term dependability. While technology and design have evolved significantly over the decades, the goal has stayed consistent: making products people can rely on. Among the stories shared, one stood out as an especially striking piece of Nilfisk history: a Nilfisk Type C1 from 1912, still kept in the same family. The owner described it perfectly: “Nilfisk Type C1 which is still proudly in the family. And best of all, it still lights! From 1912 and only 1200 pieces sold that year!” It’s hard to imagine a clearer example of longevity. More than a century later, it’s still there—still cared for, still remembered, and still capable of fulfilling the purpose it was designed for. When Durability Becomes Part Of The Story What made many of the stories special wasn’t just the year stamped onto a product—it was the meaning attached to it. People described Nilfisk machines as products that had followed them through life stages, moved between generations, and kept a place in the home because they continued to work. One entry captured the pride of preservation and performance: “Enjoy this Nilfisk M20 year 1924… After all these years, still works. Quality at the highest class!” Another reflected something more personal: how a product can become a small piece of family memory: “This heirloom from my grandparents’ 1960s is more than just an old vacuum cleaner… Every time I look at it, I see my grandmother Maria…” Here are other old machines shared by our customers: 1970s 1970s 1960s – 1970s 1950s – 1960s – 1920s Honoring Nilfisk’s Legacy While heritage is often considered as something separate from the present, for Nilfisk it remains closely connected. Reliability and performance are still central to all our products, whether it's a vacuum cleaner, high-pressure washer, or wet and dry vacuum. Technology has evolved and expectations are higher, but the goal is still to make durable equipment for everyday use. This anniversary was a special opportunity to recognize not only the products, but also the people who have relied on Nilfisk over the decades. Thank you to everyone who shared a piece of Nilfisk history with us.

Terrace Cleaner vs. High Pressure Washer: What’s the Right Choice?
Is a high-pressure washer sufficient for cleaning outdoor spaces, or should you consider a terrace cleaner? Each tool serves its own purpose, but your decision should be guided by the kind of surface you need to clean. How a Terrace Cleaner Works A terrace cleaner is a cleaning tool specifically designed for wood and WPC. Unlike a high-pressure washer, which relies on water pressure to remove dirt, a terrace cleaner uses rotating brushes combined with low water pressure to lift dirt, algae and deposits gently but effectively from the surface. Wood is a natural material with visible grains and directional fibers. Cleaning it incorrectly can lead to long-term damage, such as raised fibers or rough surfaces. A terrace cleaner addresses this issue by cleaning in straight forward and backward movements, allowing the brushes to follow the natural lines of the wood. It removes dirt without relying on aggressive water pressure, keeping the wood smooth and intact. How a High-Pressure Washer Works A high-pressure washer is a versatile tool designed for multiple outdoor cleaning tasks, such as cars and bicycles, garden furniture, stone or tiled patios, driveways and facades. It cleans by delivering water at high pressure, which is highly effective on hard, non porous surfaces. When paired with accessories like Power Patio, the cleaning action usually comes from rotating circular water jets, designed to cover large areas quickly. Why High-Pressure Cleaning Can Be Problematic for Wood While a high-pressure washer can be used on many surfaces, it is not ideal for wooden terraces if used too aggressively. Circular cleaning movements and high water pressure can work against the natural grain of the wood, gradually eroding soft fibers, and creating uneven or fuzzy surfaces over time. So, What Is the Best Product? A terrace cleaner is the right choice if your primary cleaning needs involve wooden or WPC terraces. It is ideal when you want even results without risking damage to the surface. Terrace cleaners rely on brush action rather than water pressure to clean, which means they work at lower pressures and consume less water compared to high-pressure washers. On the other hand, a high-pressure washer is better suited if you need to clean a variety of surfaces beyond wood, such as stone, tiles, concrete, or metal. It is an excellent tool for those who want one piece of equipment to handle a wide range of outdoor cleaning tasks. Ultimately, it’s about using the right tool for the job—and if you’re dealing with both wood and hard surfaces, having both tools can simply make your cleaning routine easier.

How to Change the Filter on Your Wet and Dry Vacuum Cleaner
Your wet and dry vacuum cleaner is designed to handle tough jobs, but its performance relies on one key component: the filter. Over time, filters naturally fill up with dirt and fine particles. When that happens, performance drops, the motor works harder than it should, and dust may even escape back into the air. Regular filter maintenance is one of the simplest ways to keep your wet and dry vacuum cleaner running efficiently. When Is It Time to Replace the Filter? One of the most common signs of a filter that needs to be replaced is reduced suction. If your wet and dry vacuum cleaner no longer picks up debris as effectively—even when the container isn’t full—the filter is often the cause. A clogged filter restricts airflow, which forces the motor to work harder while delivering weaker cleaning results. Visual signs are another clear indicator. Filters that appear dark, dusty, or heavily coated with fine particles are no longer able to trap debris efficiently. In some cases, you may also notice high pitched motor noises from the exhaust—a sign that airflow is compromised. Smells can also point to filter issues. Dust, hair, and moisture can build up inside the filter and lead to unpleasant odors that spread every time the machine is switched on. A clean filter helps eliminate these smells and keeps the cleaning process more hygienic. Keeping a spare filter on hand makes maintenance easy and ensures your wet and dry vacuum cleaner is always ready when you need it. How to Change the Filter Replacing the filter on a wet and dry vacuum cleaner is a simple task that only takes a few minutes. Start by switching off the machine. Open the vacuum lid to access the filter compartment, then unscrew the filter stopper and remove the used filter. Insert the new filter, secure it with the stopper, and close the lid. Once everything is properly in place, your machine is ready to use again. Using the Filter for Liquid Vacuuming Filters used in wet and dry vacuum cleaners are suitable for both liquid and dry applications. However, after vacuuming liquids, you can advantageously remove the filter and let it air dry completely before switching back to dry dust. Using a damp filter for dry vacuuming causes dust to mix with moisture, turning into a thick residue that quickly clogs the filter. Push & Clean: Maintaining Suction During Use Some wet and dry vacuum cleaners are equipped with a Push & Clean system, a feature designed to restore suction without opening the machine. As fine dust accumulates on the filter, an indicator alerts you that it’s time to activate the function. To use Push & Clean, block the air inlet or suction hose with your hand, then press the Push & Clean button 2-3 times. This creates a reverse air pulse that forces dust and debris off the inside of the filter and into the container below. It’s an effective way to maintain performance while you work. However, even with this system, filters don’t last forever. Over time, the filter will eventually need to be replaced to maintain reliable performance. Keep Your Wet and Dry Vacuum Performing at Its Best Regular filter care is essential for getting the best out of your wet and dry vacuum cleaner. By checking the filter frequently and replacing it when needed, you protect the motor, maintain strong suction, and ensure dust and debris stay where they belong—inside the machine. A small maintenance habit that helps your wet and dry vacuum cleaner deliver powerful performance for years to come.

New Products 2026: Built for Everyday Living
2026 is a special year for Nilfisk — and an exciting one for households looking to upgrade their cleaning routine. This year, we’re introducing a refreshed range of consumer products designed with smarter functionality, improved sustainability, and the reliable performance Nilfisk is known for. These new additions make it easier than ever to keep your garden looking its best. Classic Pressure Washers Our new Classic 140 model delivers dependable outdoor cleaning for everything from light patio work to more demanding jobs. With compact storage, durable metal pump, Ultraflex hose, and improved manoeuvrability, the Classic helps homeowners clean smarter — not harder. Now available on Amazon. Explore All New Arrivals Our 120‑year anniversary is a symbol of our heritage and our commitment to creating durable, high‑performance cleaning solutions for the future. Browse all new products here:👉 New Products on shop.nilfisk.com

From 1906 to the Future: Cleaning a DeLorean with Nilfisk
Over a century ago, Peder Andersen Fisker and Hans Marius Nielsen founded what would become one of the world’s most influential cleaning technology companies. Originally known as Fisker & Nielsen, the company name soon evolved into Nilfisk, a blend of the founders’ surnames. Today, 120 years later, that same spirit of innovation remains at the heart of everything Nilfisk does. As we celebrate this extraordinary milestone in 2026, we are not only honoring our legacy — we are looking toward the future. And what better way to celebrate than by bringing an icon back to the future? DeLorean, a High-Pressure Washer and 120 Years of Innovation More than a century later, that heritage continues to shine — sometimes quite literally. Have a look at how a stainless steel DeLorean is restored to a brilliant finish using a Nilfisk high pressure washer! From Heritage to High Tech Although Nilfisk is globally recognized for industrial and professional cleaning equipment, our legacy directly benefits households too. Today’s consumer range — including high pressure washers, wet & dry vacuums, and home vacuum cleaners — is built using the same engineering principles trusted by professionals. This blend of heritage and cutting edge technology means Nilfisk products are designed for: Performance – powerful cleaning delivered efficiently Durability – machines that stand the test of time Sustainability – smart design that reduces waste, effort, and energy use Looking Ahead Our anniversary is not only a celebration of where we’ve been, but a promise of what’s next. As Nilfisk marks 120 years, the focus remains on creating cleaning solutions that make life better — not just for today, but for generations to come. A century of engineering progress brought Nilfisk from a small Danish workshop to a trusted global presence. As the DeLorean returns to its legendary shine, it becomes clear how machinery built with care, expertise, and purpose can truly stand the test of time.

Nilfisk Turns 120: A Cleaner Future Starts Here
In 2026, on the 26th February to be specific, Nilfisk celebrates 120 years of innovation – and we’re just getting started. Since 1906, when we introduced the first electric vacuum cleaner in Europe, our mission has been simple: to improve quality of life through cleaner, healthier spaces. From Heritage to High-Tech Clean isn’t just about appearance – it’s about well-being. Over the decades, Nilfisk has evolved from pioneering home cleaning solutions to developing AI-driven robotic machines for professional environments. This expertise benefits you too: every Nilfisk product for the home is designed with the same commitment to performance, durability, and sustainability that consumers and professionals trust worldwide. Innovation has been at the heart of Nilfisk since day one. Founded in 1906 on a vision of improving everyday life through technology, Nilfisk introduced Europe’s first electric vacuum cleaner in 1910 – a breakthrough that changed home cleaning forever. From there, progress never stopped: in the 1940s, we launched industrial vacuums; by 1955, we refined floor cleaning machines for greater safety and efficiency. In 1969, Nilfisk vacuums were even used by NASA to remove harmful dust from space shuttles. The following decades saw global expansion, major acquisitions, and pioneering products like fuel cell-powered machines in 2013 and autonomous scrubbers in 2019. Today, with smart solutions such as wireless vacuums, Nilfisk continues to lead the way – harnessing technology not for its own sake, but to anticipate customer needs, protect health, and raise the standard of clean for generations to come. Why Clean Matters A clean home means fresher air, safer surfaces, and peace of mind. It helps families breathe easier, reduces allergy flare ups, and helps everyone feel more comfortable. That’s why we keep innovating – because clean shapes how we live, learn, and grow. What’s Next? Our anniversary isn’t just about looking back – it’s about moving forward. Soon, we will be launching exciting new products, stay tuned!

Winter Storage Tips for Your Pressure Washer
A little winter prep goes a long way to help ensure your machine is ready to clean again next spring. Drain the water, protect your hoses, and store in a dry, frost-free place —your jet washer will thank you come spring! Water left inside the machine, hoses, or accessories can freeze, expand, and cause cracks or other mechanical failures. Securing cables, covering the machine, and performing a quick maintenance check ensures your pressure washer stays in top condition year after year. How to prepare your pressure washer for winter Disconnect your water supply from its source. Turn off your machine and then pull the trigger on your gun to release the pressure and allow the water to drain from the nozzle. Disconnect your water supply hose from your machine. Disconnect the high-pressure hose from the gun, turn your machine on and allow the pump to drain out the remaining water from the system. Turn your machine off again when no more water comes out of the high pressure hose. Unplug your machine. Disconnect the gun and lance and shake gently to remove any remaining water. Be sure to also shake the nozzles and drain any residual water from them too—especially the rough (rotary) nozzle. Lay the hose out straight on the ground and use the reel handle to wind it in easily and free from kinks and knots. Neatly secure the power cable with the elastic band. Store the nozzles, lance, gun & foam sprayer in their designated places on your machine. Store in a dry and frost-free place. Choose a dry area where the temperature will remain above freezing. Avoid damp areas to prevent rust and corrosion. Keep your pressure washer in top condition Regular Maintenance: Before storing, inspect your pressure washer for any signs of wear or damage. Addressing issues before storage can prevent complications when you use it again. For example, check that O-rings on the water inlet connector on the machine, on the high pressure hose (end that connects to the gun) and also on the ends of the lance are in good condition. Protect with a Cover: Cover your machine with an old sheet to protect it from dust, debris, and moisture during winter storage. Nilfisk pressure washer benefits Nilfisk machines come with an external foam sprayer, which means no detergent runs through the pump or motor, unlike other machines. This has several benefits: No residue buildup: Since the detergent doesn’t pass through the internal components, there’s no residue, which helps extend the life of the pump and motor. Less detergent waste: You can store any remaining detergent in the external bottle — no need to flush it out of the machine. Easily switch detergents: If you want to switch between different tasks using specific detergents, such as from car cleaning to patio cleaning — you can simply swap the bottle with no waste or risk of mixing products. In addition, all Nilfisk machines have a metal pump, even in the smaller models, and metal hose connectors. This means: Increased durability: Metal components withstand cold temperatures better than plastic, reducing the risk of cracking or damage during winter storage. Low maintenance: Metal parts are less prone to wear making it easier to store the machine for long periods without worrying about leaks or failures. The hose reel (on most Nilfisk machines) another practical feature: Fast and easy reeling: The hose can be wound back neatly in seconds, keeping it tangle-free. Easy water drainage: Water flushes out easily from the hose during storage, reducing the risk of freezing or internal damage. Neat storage: The hose stays protected and organized, which makes winter storage simpler and safer. Finally, on-board storage ensures that all items — nozzles, lance, cables, and accessories — are stored neatly on the machine itself: Everything in one place: You leave all components together, reducing the risk of losing or misplacing items when picking up the machine again. Organized and ready to use: Makes setup and cleanup faster, and keeps the machine tidy during winter storage. Explore all our accessories and spare parts on the website.

How to Use Your Nilfisk Extension Lance
Cleaning large surfaces, patios, or vehicles often means you need that extra reach. That’s where the Nilfisk extension lance comes in. Designed to give you more flexibility and working area, this simple yet powerful accessory helps you clean efficiently – without the need to stretch or bend. What the Extension Lance Does An extension lance is an easy-to-attach accessory for your Nilfisk pressure washer, extending your spray reach for those hard-to-get areas such as walls, gutters, or greenhouses. It connects directly to the spray gun and maintains full water pressure, giving you powerful results with minimal effort. When cleaning tall or wide areas like roofs, the added reach not only boosts efficiency but also reduces physical strain – so you can work faster and more comfortably. Using the Extension Lance with Detergent Many users wonder if the extension lance can be used with detergent – and the answer is yes. It can even be used without the need to refill detergent tanks. The 1L bottles attach directly to the lance, no need for refilling. The detergent will flow through the system, allowing you to apply soap evenly even when the lance is attached. See how: For 2.5L bottles, You can leave the bottle on the ground and attach the hose, see how: Step by step cleaning: Attach the extension lance to your pressure washer hose. Apply detergent at low pressure to ensure full coverage. Rinse at high pressure after allowing the detergent to sit for a few minutes. You can watch how it’s done in Nilfisk’s extension lance unboxing: Combine It with Other Smart Accessories The extension lance works perfectly with: Auto Brush – Ideal for cleaning cars, green houses and solar panels, this soft-bristled brush helps remove dirt gently from paintwork. Combined with the extension lance, you can reach roofs and larger vehicles more comfortably. Discover the full range of pressure washer accessories designed to make every cleaning job easier and faster. Keep Your Cleaning Kit Ready After use, rinse the lance and accessories with clean water to prevent detergent build-up, and store them in a dry place. Explore more helpful tips for your pressure washer, like how to clean your patio or how to choose the right detergent for your pressure washer.

How to Know When to Change the Filter on Your Vacuum Cleaner
Your vacuum cleaner works hard to keep your home clean, but did you know that its filter plays a vital role in ensuring top performance? A clogged or worn-out filter doesn’t just reduce suction power—it can also release dust back into the air. That’s why keeping on top of filter changes is one of the simplest ways to maintain your vacuum and ensure a healthier home environment. Why Is My Vacuum Losing Suction? One of the most noticeable signs that it’s time to change your filter is a drop in suction. If your vacuum isn’t picking up dirt, crumbs, or pet hair as effectively as before—even after checking that the dust bag or container isn’t full—the filter could be clogged. A blocked filter restricts airflow, forcing your vacuum to work harder while delivering weaker results. Replacing or cleaning the filter restores airflow and ensures your vacuum runs at its full cleaning potential. What Does a Dirty Vacuum Filter Look Like? A quick visual check is often all you need. If your filter looks dusty, grey, or covered in debris, it’s a clear indicator that it can no longer trap particles efficiently. While some filters can be washed and reused, others should be replaced when they show visible buildup. Regular inspections—about once a month—make it easy to stay on top of vacuum maintenance and prevent long-term damage to your machine. Why Does My Vacuum Smell? Does your vacuum smell less than fresh when you switch it on? A dirty filter may be the culprit. Dust, pet dander, and even trapped moisture can accumulate in the filter, leading to lingering odours that spread around your home every time you clean. Swapping in a new filter not only improves suction but also helps your home smell fresher. For pet owners in particular, frequent filter changes are a must to keep odours under control. Why Is My Vacuum Blowing Out Dust? Perhaps the most concerning sign of all is dust escaping from your vacuum. If you notice fine particles blowing back into the air or settling on nearby surfaces as you clean, your filter may no longer be sealing properly or is too clogged to function. This is especially problematic for allergy sufferers or households with children. A fresh vacuum filter ensures dust stays trapped where it belongs—inside your machine. How Often Should I Change My Vacuum Filter? As a general rule, filters should be checked every 3–6 months, depending on usage and your household environment. Homes with pets, carpets, or allergy concerns may need more frequent replacements. To make things easy, it’s worth keeping a spare filter on hand so you can swap it out when needed. You can explore the full range of vacuum filters available to find the right match for your model. Keep Your Vacuum Cleaner Working Like New Changing your filter regularly is a small step that makes a big difference in your vacuum’s performance and your indoor air quality. Combine this with other simple vacuum cleaner maintenance tips, like emptying the dust bag frequently and checking for blockages, and your machine will serve you reliably for years to come.

Pushing the Clean Future Forward: Nilfisk's Sustainability Journey
At Nilfisk, sustainability is woven into how we run our business. From developing innovative cleaning tools to ensuring transparent business practices, we are building a cleaner, more responsible future —together. We help our customers solve real-world cleaning challenges while reducing our impact on people and the planet. At Nilfisk, sustainability is built into everything we do, from durable, efficient designs that have the potential to cut resource use and minimize costs - to ergonomic solutions that support operator wellbeing. Our efforts are guided by our customer needs and validated by ISO-certified systems, SBTi-aligned climate goals, and EcoVadis Gold recognition. Together, we are shaping a cleaner, more sustainable future. Sustainability Rooted in Strategy Nilfisk is dedicated to transparency and accountability in our sustainability performance. We set ambitious targets, monitor progress, and report regularly on key ESG metrics and KPIs to top management. This allows our customers to trust that we are a low risk partner for their business. Our sustainability commitments are embedded in Nilfisk’s value proposition and business strategy. The foundation of our sustainability work is shaped by our annual Double Materiality Assessment (DMA) which allows us to continuously evaluate our sustainability impact. Want to explore the full picture? Check out our Integrated Annual Report 2024, which details our sustainability work. Taking Real Action with Global Standards EcoVadis Gold – For four years running, we have secured the EcoVadis Gold rating in 2025. Nilfisk is placed in the 98th percentile of all companies assessed globally. Score increase - From 2024 to 2025, Nilfisk improved its score from 80 to 84 points Science Based Targets Initiative – We remain committed to reducing our Scope 1, 2, and 3 greenhouse gas emissions in accordance with climate science by having set near-term 2030 targets aligned with the 1.5°C pathway and committing to achieve Net zero by 2040. CDP (Carbon Disclosure Project) – Since 2020, we have maintained a strong score of A- for climate transparency. Since 2024, Nilfisk has received a score for water where we achieved a B- score. UN Global Compact – Since 2010, we have been a member of UN Global Compact and have since then been disclosing our company’s performance on its 10 Guiding Principles. 3. Transparent Sustainability Data We believe sustainability shines brightest under the spotlight. That’s why we: Publish integrated financial and sustainability reports—available since 2016 Share ESG fact books packed with key performance metrics. Offer full transparency on our policies, codes of conduct, and ISO-certifations. Would you like more details on our current work with sustainability? Take a look in our Integrated Annual Report 2024 for a breakdown of our value chain and sustainability performance. 4. Let’s Talk—We are here to help. Your ideas matter. Questions? Feedback? Contact us at: 📧 sustainability@nilfisk.com