News
News

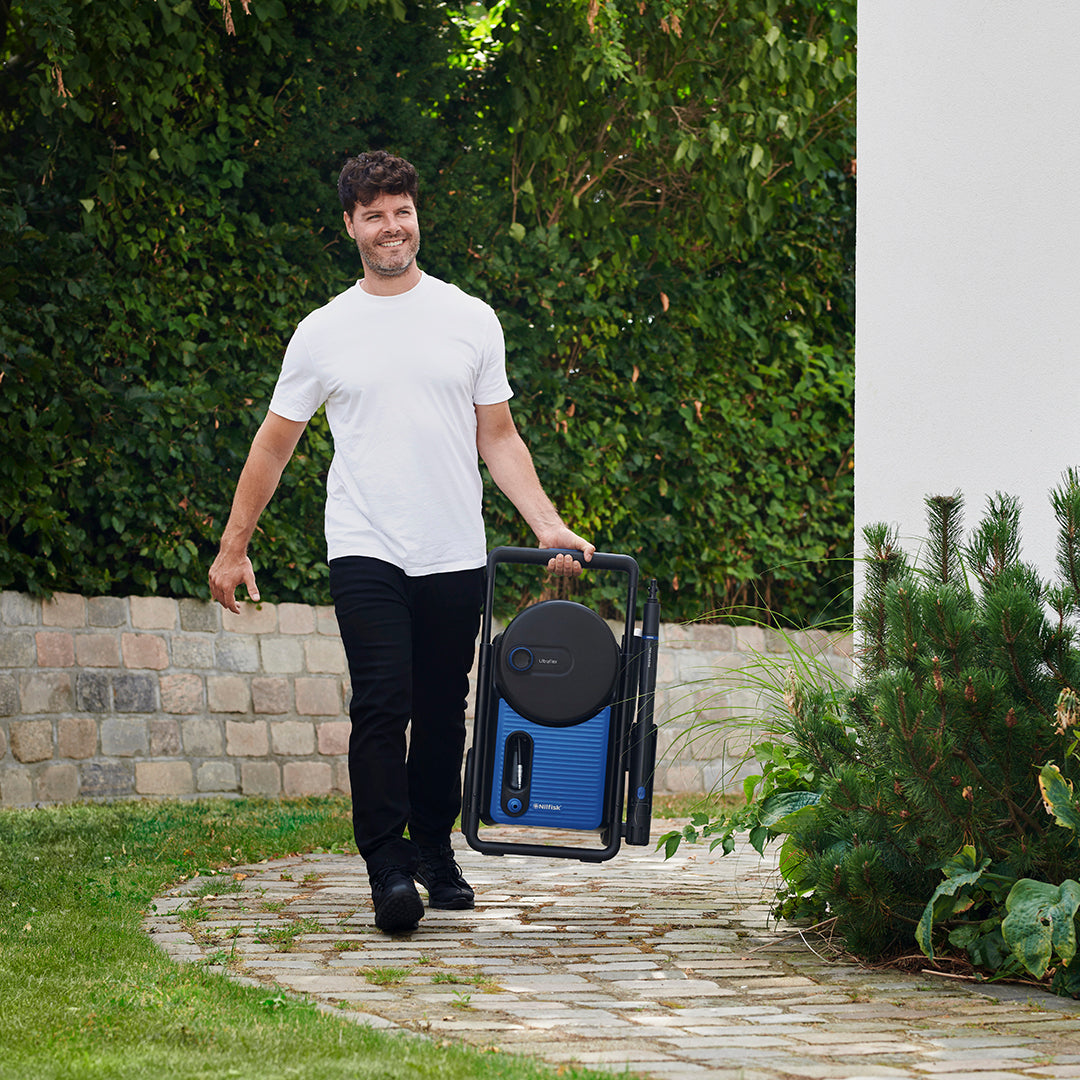
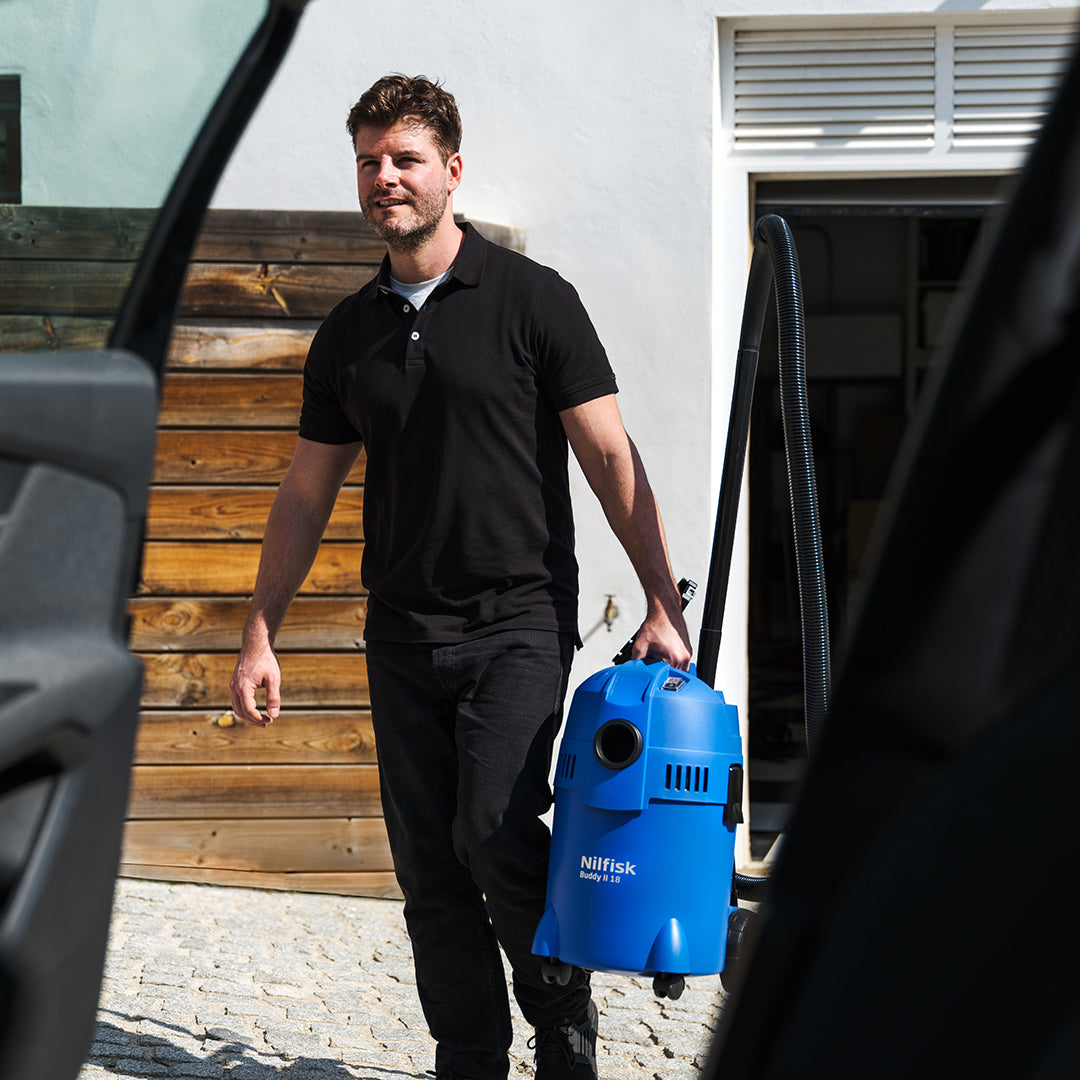
How to Clean Artificial Grass with a Pressure Washer and Wet & Dry Vacuum
Artificial grass is a fantastic low-maintenance alternative to natural lawns—but it still needs occasional cleaning. Over time, debris, pet mess, and dirt can build up, causing discolouration, odours, or even moss. In this guide, we’ll show you how to clean artificial grass using a pressure washer and a wet and dry vacuum, including when and how to use each method. Why Clean Artificial Grass? Cleaning artificial grass keeps it: Visually vibrant and green Free from odours (especially from pets) Safe for children and pets Longer-lasting Even though artificial turf doesn’t grow weeds or need mowing, it still collects: Dust and pollen Leaves, twigs, and organic debris Pet hair and waste Algae or moss in shaded areas Method 1: Cleaning with a Pressure Washer Best for: Seasonal deep cleans, compacted dirt, moss, and outdoor installations with proper drainage. What You Need: Pressure washer (adjustable nozzle recommended) Optional: turf-safe detergent or diluted vinegar Broom or turf brush (for pre-clean) Step-by-Step: Remove debris: Pick up branches, leaves, or large waste. Brush the turf: Loosen compacted dirt using a stiff broom. Adjust the nozzle: Set to a wide fan spray to prevent turf damage. Spray at an angle: Hold 30–50 cm from the surface and spray across the grain. Use detergent if needed: Rinse thoroughly if using a cleaning agent. Allow to dry: Let the turf air dry completely before walking on it. Pro Tips: Avoid spraying glued seams directly Only use this method on turf with drainage Test pressure on a small area first Method 2: Cleaning with a Wet & Dry Vacuum Best for: Quick clean-ups, pet hair, indoor turf, balconies, and damp debris. What You Need: Wet & dry vacuum (like the Nilfisk Buddy or Multi series) Optional: brush nozzle or turf deodoriser Step-by-Step: Vacuum dry debris: Switch to dry mode and vacuum slowly. Tackle moisture: Switch to wet mode to remove rainwater, spills, or damp debris. Deodorise if needed: Sprinkle turf-safe deodorising granules. Benefits: No risk of pressure damage Works on any surface Safe for indoor or shaded turf Bonus Tips for Pet Owners Clean solid waste immediately Rinse pet spots regularly with water Use enzyme-based turf cleaners if odours persist Pressure Washer vs. Wet & Dry Vacuum Feature Pressure Washer Wet & Dry Vacuum Best for Deep clean, stains, algae Routine cleaning, pet hair Surface suitability Outdoor turf with drainage Indoor/outdoor, all types Frequency 2–4× per year Weekly to monthly Risk of damage Medium (if used improperly) None Keep Your Turf Looking Its Best For optimal turf hygiene, use a wet & dry vacuum for weekly maintenance and a pressure washer for seasonal deep cleans. This combination will extend the life of your artificial grass and keep it clean, odour-free, and safe year-round. Looking for reliable tools? Browse our collection of wet & dry vacuums and pressure washers made for turf, patios, and outdoor spaces.

How to Empty a Fish Tank with a Wet & Dry Vacuum Cleaner
Easily empty your aquarium without spills using a Nilfisk wet and dry vacuum cleaner. Discover a quick, mess-free method to clean your fish tank with this step-by-step guide.

How to Clean Solar Panels Safely With a Pressure Washer
If your home or business uses solar energy, regular maintenance is key to keeping your system efficient. One of the most effective ways to do this is by cleaning your solar panels with a pressure washer. In this guide, we’ll explain how to do it safely and what tools to use. Why Clean Solar Panels? Over time, solar panels accumulate dirt, dust, pollen, and bird droppings — all of which can block sunlight and reduce energy output. Research shows that dirty solar panels can lose up to 25% of their efficiency. Cleaning them regularly improves performance, saves money and extends their lifespan. Can You Use a Pressure Washer to Clean Solar Panels? Yes — but it must be done carefully. A high-powered jet directed at the wrong angle can damage the panel surface. However, when used correctly, a Nilfisk pressure washer with the right accessories offers a safe, efficient, and chemical-free way to clean solar panels — no ladder required. How to Clean Solar Panels With a Pressure Washer 1. Use Low Pressure and Wide Spray Use a low-pressure setting with a wide-angle nozzle to avoid damage. Avoid turbo nozzles or pencil jets. If you’re looking for the ideal tool, the Nilfisk Core series offers adjustable pressure for safer solar panel cleaning. 2. Clean on a Cool Day Perform cleaning early in the morning or on cloudy days. This prevents water from evaporating too quickly and leaving marks. 3. Work From the Ground Always clean from a safe distance. Use an extension lance if needed. Start at the top of the panel and move downward for full coverage. 4. Rinse and Air-Dry Finish with a clean water rinse using the same low-pressure setting. Let the panels dry naturally — no need to wipe. Best Nilfisk Products for Cleaning Solar Panels Here are a few recommended tools: Nilfisk Compact or Core pressure washers– Compact and adjustable pressure control Auto Brush– Ideal for cleaning with a soft touch Extension Lance – Reach higher panels without ladders How Often Should You Clean Your Solar Panels? In most homes, you should clean them once or twice per year. If you live in an area with high pollen, air pollution, or lots of birds, clean them more frequently to maintain peak performance. Summary: Keep Your Solar Panels Efficient With Nilfisk Keeping your solar panels clean doesn’t require expensive services or risky ladder work. With a Nilfisk pressure washer, the extension lance and the right settings, you can maintain your system from the ground — quickly, safely, and effectively. Browse Nilfisk pressure washers and accessories now to find the perfect match for your home.

9 Surprising Things You Can Clean with a Wet & Dry Vacuum Cleaner
When most people think of a vacuum cleaner, they picture the usual suspects: dust, crumbs, pet hair, and maybe the occasional spill. But if you’ve got a wet and dry vacuum cleaner in your home, you’re sitting on a multitasking powerhouse. Here are 9 surprising things you probably didn’t know you could clean with your wet & dry vac — and yes, it’s as satisfying as it sounds. 1. Broken Glass Spilled a glass of water and shattered the tumbler in the process? No problem. Wet & dry vacs can pick up both liquid and sharp fragments — just make sure you empty the tank carefully afterwards. 2. Soil or mud Knocked over a potted plant? Instead of sweeping and smearing mud, your wet & dry vac can clean up both the dry soil and any spilled water, leaving the area spotless (and your plant hopefully still alive). 3. Artificial Grass and Outdoor Patios Wet & dry vacs are amazing for blasting dirt, leaves, and debris from fake grass, patios, or outdoor tiles — especially when combined with a blower function. 4. Car Interiors – Even the Wet Bits Muddy mats, spilled drinks, pet hair, crumbs, and sand from last weekend’s beach trip — all gone in minutes. Wet & dry vacs are perfect for deep-cleaning car interiors, especially when things get messy. 5. Clogged Sinks (Yes, Really!) Some wet & dry vacs can be used to suck out clogs from drains using the home kit— it's a bit unconventional, but it can work wonders on shallow blockages. 6. Flooded Basements or Laundry Rooms Water leak? Washing machine overflow? Grab your wet & dry vacuum and start removing standing water fast — much easier than using mops and buckets. 7. DIY & Renovation Debris Whether you're sanding a wall or working on a craft project, wet & dry vacs can handle fine dust, wood shavings, and even small pieces of plaster or cement. 8. Garden Leaves – Wet or Dry Forget the rake! A wet & dry vacuum with blower function can easily collect or push away fallen leaves, whether they’re dry and crunchy or damp and soggy. Perfect for patios, driveways, and corners where leaves tend to pile up. 9. Kitchen Messes – Wet & Dry From spilled cereal and milk to pasta sauce splashes, your kitchen floor sees it all. A wet & dry vac can deal with wet food, dry crumbs, and even sticky liquids without a fuss. Discover the Power of Versatility Whether you're dealing with muddy boots, scattered leaves, or a surprise kitchen spill, a wet & dry vacuum cleaner is your go-to tool for quick, efficient clean-up — indoors and out. At Nilfisk, we believe cleaning should be smart, simple, and surprisingly satisfying. So next time mess strikes, grab your vacuum and put it to work in ways you never imagined. Happy cleaning!

How to Clean Wooden Decking with a Pressure Washer
Wooden decking is a great addition to any outdoor space, but over time, dirt, moss, and algae can build up, making it look dull and even slippery. Regular cleaning with a pressure washer is the most effective way to restore your decking’s natural beauty and keep it safe to use. Follow these steps for the best results. Prepare Your Decking Before using a pressure washer, remove any furniture, planters, or other objects from the decking. Sweep or vacuum with a wet and dry, any loose dirt, leaves, and debris to ensure an even clean. Choose the Right Pressure Washer setting and nozzle For wooden decking, use a pressure washer with an adjustable setting, ideally on level 2 (between 50-70 working bar pressure) to avoid damaging the wood. A gentle nozzle is recommended, as it provides a gentle but effective clean without risk of damaging the paintwork. Apply a Detergent Using a detergent specifically designed for wooden surfaces such as the stone and wood cleaner helps break down grime, and mildew. Apply the detergent with the pressure washer’s foam sprayer, then let it sit for 5-10 minutes to loosen dirt. Wash the Decking Hold the pressure washer 30-50 cm away from the surface and move in long, even strokes, following the direction of the wood grain. Avoid holding the spray in one spot for too long to prevent gouging the wood. Test on a small, hidden area first to ensure the pressure setting is safe for your decking. Rinse Thoroughly After cleaning, rinse the deck with clean water to remove any leftover detergent or dirt. Ensure that all soap residue is washed away to prevent slipperiness. Allow to Dry & Apply a Protective Finish Let the decking dry completely (at least 24-48 hours) before placing furniture back. To protect the wood and prolong its life, consider applying a wood sealant or oil after cleaning. Tips for Avoiding Damage to Wood and Its Treatment Use a lower pressure setting to prevent splintering or stripping the wood finish. Keep the nozzle moving—never hold it in one spot too long. Follow the grain of the wood to avoid visible streaks or damage. Use a detergent made for wood to clean effectively without harsh chemicals. Apply a protective sealant after cleaning to restore and protect the surface. Tips for Maintaining Your Wooden Decking Sweep regularly to prevent dirt buildup. Clean with a pressure washer at least once a year. Avoid using high-pressure settings that may damage the wood. Apply a protective sealant annually to extend the lifespan of your decking. By following these steps, you can keep your wooden decking looking fresh and inviting all year round. Happy cleaning!

Interview with DIY product manager at Nilfisk
What goes into designing and developing a high-quality pressure washer that meets the needs of modern consumers? To get an inside look, we sat down with Troels Bock, Product Manager for Consumer High-Pressure Washers and Wet & Dry vacuums at Nilfisk. In this interview, Troels shares insights on industry trends, product quality, and sustainability—offering a glimpse into how Nilfisk continues to innovate in the world of cleaning solutions. Can you tell us a bit about yourself and your role as a product manager? My name is Troels and I am the Product Manager (PM) for Consumer High pressure washers and Wet & Dry Vacuums. As a PM I have a wide spectrum of tasks, from new development to daily operations, where I need to cooperate with sales, marketing, R&D and service. I thrive in this position because no days are alike and I have to opportunity develop and introduce new products, that makes cleaning simpler. What are the current/upcoming trends in the pressure washer industry? Prolonging the lifetime of consumer-products. Part of the sustainability agenda is to be more aware of our consumption as consumers. Instead of throwing products out after a few years of usage, I experience that more and more people are willing to pay more a better quality, or repair/maintaining the products they have, to prolong the products lifetime. Using a High pressure washer for cleaning your patio or stone tiles with a subsequent treatment, can extend the life of your terrace for multiple years. How do you ensure the quality and durability of Nilfisk products? For this we have a brilliant quality department, who constantly monitor and evaluate our products. For each product we have multiple test methods to ensure the quality lives up to the Nilfisk standards. In an era of increasing environmental awareness, how does Nilfisk address sustainability in production? We are constantly on the look-out for eco-friendly solutions. These solutions could be more efficient motors, so the customer will use less power without compromising the cleaning quality. Another solution could be looking into the plastic usage we have, either by optimising the product structure to use less plastic or use recycled plastic – in best case, both. As the pressure washer industry evolves, Nilfisk remains committed to quality, durability, and sustainability. With innovations in materials, energy efficiency, and product longevity, our goal is to provide consumers with reliable cleaning solutions that stand the test of time. Nilfisk recently appeared in the EU PROMPT report as one of the highest average lifecycle for vacuum cleaners. A big thank you to Troels for sharing his expertise and giving us a behind-the-scenes look at what it takes to develop top-tier pressure washers. Stay tuned for more insights from our team.

Are canister vacuums dying out?
In the world of household cleaning, trends come and go, but some tools remain steadfast—or do they? Canister vacuums, once a staple in homes worldwide, have seen stiff competition in recent years from sleek cordless stick vacuums and robotic cleaners. So, are canister vacuums becoming a relic of the past, or do they still hold a valuable place in the modern home? The Rise of Alternative Vacuums Technological advancements have introduced a wave of new vacuum designs. Cordless stick vacuums have gained popularity for their lightweight and manoeuvrable design, making them a favourite for quick cleanups and small spaces. Robot vacuums add the allure of automation, offering hands-free convenience. With these innovations, many wonder if traditional canister vacuums still have a market. What Makes Canister Vacuums Unique? Despite the rise of alternatives, canister vacuums continue to offer distinct advantages: Superior Power: Canister vacuums normally have stronger suction power than their cordless counterparts, making them ideal for deep and thorough cleaning. Versatility: These vacuums excel at multi-surface cleaning. Whether it’s hardwood floors, carpet or upholstery, canister vacuums can tackle a variety of surfaces with ease. Extended Run Time: Unlike cordless vacuums, canister models don’t rely on batteries, ensuring consistent performance without the need for recharging. Challenges in Today’s Market While canister vacuums boast impressive functionality, their bulkier design and reliance on cords can feel outdated in a world moving toward compact and wireless solutions. The convenience factor of newer vacuum types is often more common in smaller homes or urban apartments. Who Should Use Canister Vacuums? Canister vacuums are the best choice for: Pet Owners: Their powerful suction and specialised vacuum cleaner accessories handle pet hair and dander with ease. Larger Households: Homes with more space and diverse flooring types benefit from the robust capabilities of canisters. Cleaning Enthusiasts: For those who prioritize deep cleaning and allergen control, the HEPA filters often found in canister models are unmatched. Dual Vacuum Users: Many households opt to have both cordless and canister vacuums, using each for different cleaning tasks. Cordless models are perfect for quick touch-ups, while canisters handle more intensive cleaning sessions. The Verdict: Are They Dying Out? While canister vacuums may not enjoy the same spotlight they once did, they’re far from obsolete. Instead, they’ve become a staple product, valued by consumers who need powerful, versatile, and reliable cleaning solutions. Nilfisk continues to innovate within this category, ensuring canister vacuums remain relevant by incorporating features like improved manoeuvrability, quieter operation, and advanced filtration systems. The cleaning landscape is evolving, but canister vacuums still have a dedicated following. They may no longer dominate the market, but for those who appreciate their strengths, they remain an essential tool. Whether you’re a homeowner looking for powerful cleaning or someone battling allergens, canister vacuums prove that they’re not just surviving—they’re adapting.

How to Choose the Right Detergent for Your Pressure Washer
Nilfisk’s detergent range is designed to cater to a wide variety of cleaning tasks, ensuring optimal performance while maintaining the longevity of your equipment. All our pressure washers come with the Foam Sprayer, making it simple to apply detergent onto your surface and remove grime with ease. If you want an even thicker foam, you can get your hands on our Super Foam Sprayer with power settings. Our pressure washer detergents can be used with the Foam Sprayer or Super Foam Sprayer, simply pour the detergent into your Foam Sprayer or Super Foam Sprayer bottle to get started. Here’s a guide to help you choose the right pressure washer detergent for your needs To Clean decking and other outdoor surfaces The STONE & WOOD CLEANER is an excellent choice for cleaning stone pathways, wooden decks, and outdoor furniture. Its versatile formula is also suitable for playgrounds, grills, garden tools, and lawn equipment. If you’re tackling tough dirt and grime on natural surfaces, this detergent is a go-to solution. To Clean Garden furniture The RATTAN & PLASTIC CLEANER is specifically formulated to clean and protect synthetic materials like rattan and plastic. It’s ideal for refreshing outdoor furniture and accessories, ensuring a deep clean without causing damage. Like the Stone & Wood Cleaner, it’s also compatible with other applications such as garden tools and fences. To Clean Vehicles If you need to clean your car or other vehicles, the CAR COMBI CLEANER is designed for this purpose. Its gentle yet effective formula removes dirt and road grime, leaving a streak-free finish. Additionally, it can be used on other outdoor items such as garden tools and furniture. To Clean Caravans and Boats For larger vehicles and specialized equipment like caravans, trailers and boats, the CARAVAN & BOAT CLEANER is the perfect solution. This detergent is tailored to handle the unique challenges of cleaning large surfaces, including removing salt and dirt from fiberglass boats. To Clean and Motorcycles The BIKE & MOTORCYCLE CLEANER is a must-have for maintaining two-wheelers. Its formula cuts through grease and mud, ensuring a thorough clean without damaging delicate components. This detergent can also be used on similar equipment and tools. Tips for Best Results with detergents Always refer to your pressure washer’s manual to ensure compatibility with detergents. Use detergents with eco-friendly certifications, such as Nilfisk’s options with Nordic Eco Labels, to reduce environmental impact. Pour the detergent into the Foam Sprayer bottle to get started. By selecting the right detergent for your cleaning tasks, you’ll achieve better results while protecting your surfaces and equipment. Nilfisk’s comprehensive range ensures there’s a product for every need, making cleaning more efficient and effective.

How to Vacuum Liquids with a Wet and Dry Vacuum Cleaner
A wet and dry vacuum cleaner is a versatile tool that can handle everything from dust and debris to spilled liquids. Whether you're dealing with a flood, a spilled drink, or cleaning up after a DIY project, these vacuums are built to make the job easy. What Liquids Can You Vacuum with a Wet and Dry Vacuum Cleaner? Wet and dry vacuum cleaners are designed to handle a variety of liquids, making them incredibly versatile. You can use them to clean up water from spills, floods, or leaks, as well as non-corrosive household liquids like juice, coffee, or soda. They're also great for outdoor use, such as cleaning up puddles, rainwater, or even mild garden debris mixed with water. However, avoid vacuuming flammable, corrosive, or hazardous liquids like gasoline, bleach, or strong chemicals, as these can damage the vacuum or pose safety risks. With this in mind, your wet and dry vacuum can become your trusted tool for tackling both everyday messes and more significant cleaning challenges. Here’s how to safely and effectively vacuum liquids with your wet and dry vacuum cleaner. Step 1: Prepare Your Vacuum Before starting, make sure your vacuum is set up for liquid collection. Remove dust bags as they can become damaged when exposed to liquids. You can keep your filter inside, but ensure it is dry before you use the machine to vacuum solids again. Step 2: Choose the Right Attachment Depending on the liquid you need to vacuum, use the floor nozzle for spells or just the normal hose nozzle if you want to remove water from a bucket or non-flat surface. Step 3: Start Vacuuming Place the nozzle over the liquid and turn on the vacuum. Slowly move it across the wet area, allowing the powerful suction to remove the liquid. Step 4: Monitor the Tank Wet and dry vacuums have a collection tank where the liquid is stored. Many models include a float mechanism that will stop suction automatically when the tank is full. However, it’s a good idea to regularly check the tank to avoid overfilling, especially during larger jobs. Step 5: Empty the Tank Once the tank is full or the job is done, turn off the vacuum and carefully remove the tank. Dispose of the liquid according to local regulations—avoid pouring it into drains if it contains chemicals or hazardous substances. Clean the tank with soap and water to prevent odours and residue buildup. Safety Tips Always unplug the vacuum before emptying or performing maintenance. Avoid vacuuming flammable or corrosive liquids. Check the power cord and connections to ensure they remain dry during use. Always wait for the filter to dry after vacuuming liquids, before you use it for dry debris. With a little preparation and care, a wet and dry vacuum can be your go-to solution for tackling liquid messes effortlessly!

Easy Garden Cleanup: Using a Wet and Dry Vacuum Cleaner for Leaf Removal
Cleaning up in the garden can be a repetitive task, especially in the autumn when the leaves seem like they will never end. While rakes and leaf blowers are popular options, a wet and dry vacuum offers a versatile alternative for a tidy garden. These vacuums not only pick up leaves but often come with a blow function, giving you two tools in one! Here’s how to use a wet/dry vacuum for leaf cleanup and make the most of its features. Check Your Wet & Dry Vacuum’s Leaf and Blow Capabilities Not all wet/dry vacuums are built to handle leaves, so choose a model with powerful suction and a large-capacity tank (30L) for the best results. Additionally, check for a blow function, which is on all Nilfisk models. This setting allows you to switch easily between vacuuming up and blowing leaves to pile them up or direct them out of difficult areas. Prepare the Wet & Dry for Leaf Collection Before starting, check the vacuum’s filter to ensure it’s securely in place and suitable for collecting debris. Remove any dust bags designed as they’ll clog with leaves. If your vacuum has different nozzle attachments, use a wide one to cover ground quickly. Use the Blow Function to Gather Leaves Start by switching the vacuum to its blow function to gather leaves into piles. The blow function is perfect for pushing leaves out from under bushes, shrubs, or tight spots where a rake can’t reach. Position the nozzle just above the ground and direct leaves toward a central area. This can save you time and energy, making it easy to vacuum up leaves in bulk once they’re gathered. Start Collection Once you have put the leaves into manageable piles, we recommend using a shovel to quickly put the bulk of leaves into binbags. This will be easier than using the vacuum right away as the machine will fill up fast and require emptying too often. Switch to Vacuum mode Once you have put most of the leaves into binbags, switch the Wet & Dry to the vacuum mode. Place the nozzle close to the ground and slowly work through each pile. Wet/dry vacuums are excellent for dry leaves but may require a couple of passes on damp leaves to prevent clogging. Be sure to empty the tank frequently to keep suction strong and prevent any blockages. Final Cleanup and Maintenance After your garden is clean, empty and rinse the vacuum tank. Wet leaves can quickly decompose and leave residue inside, so it’s best to clean it thoroughly after each use. Don’t forget to clean or replace any filters, and store the vacuum in a dry, safe place. Why a Wet and Dry Vacuum is Great for Leaf Cleanup The dual vacuum and blow functions make a wet and dry vacuum a valuable tool for leaf cleanup. With powerful suction and the ability to create organized piles using the blow feature, you get a more efficient and precise cleanup. Plus, its ability to handle both dry and damp leaves makes it more versatile than a standard leaf blower.

What Are Pressure Washer O-Rings & When Do They Need Replacing?
Pressure washers are ideal for cleaning tough dirt and grime from surfaces like driveways, patios, and vehicles. However, one small but essential component of these machines often gets overlooked—the O-ring. Though tiny, O-rings play a crucial role in keeping your pressure washer functioning properly. In this blog post, we’ll explore what O-rings are, their importance, and when to replace them. What Are O-Rings? O-rings are small rubber or silicone seals used to prevent leaks in various parts of a pressure washer. These rings create a watertight seal between two connecting parts, such as the jet washer hose, the lance or the water inlet coupling. O-rings are circular and flexible, designed to withstand the pressure of water flowing through the washer. Over time, the intense pressure and frequent usage can wear down these seals, causing leaks and diminishing the efficiency of your pressure washer. In some cases, worn O-rings may even lead to machine failure if water leaks into critical components like the motor or pump. When Should O-Rings Be Replaced? Visible Cracks or WearOne of the most obvious signs that an O-ring needs replacement is visible cracking, wear, or deformation. Over time, exposure to high-pressure water and chemicals can degrade the material. If you notice your O-rings are no longer smooth or have cracks, it's time to replace them. Leaking WaterIf water is leaking from any connection points in your pressure washer, it’s often a sign of a damaged O-ring. This could happen between the hose and the nozzle, or the hose and the pressure washer itself. If tightening the connections doesn't stop the leak, inspect the O-ring for damage. Decreased PressureLeaky O-rings can cause a drop in the pressure washer's performance. If your machine isn’t delivering the same powerful spray as before, worn-out O-rings could be to blame. Replacing them can restore full functionality. Regular MaintenanceEven if there are no visible signs of wear, O-rings should be checked regularly as part of routine maintenance. Manufacturers often recommend replacing O-rings annually to prevent unexpected issues. How to replace the O-ring on your pressure washer Watch our latest video to see how to change the O-ring on your pressure washer lance: O-rings may be small, but their role in maintaining your pressure washer’s performance is vital. Regular inspections and timely replacements can prevent costly repairs and extend the life of your machine. Keep an eye out for wear, leaks, and reduced pressure, and you’ll ensure your pressure washer runs smoothly for years to come.

How to Unclog Drains Using a Wet & Dry Vacuum Cleaner
How to Unclog Drains Using a Wet & Dry Vacuum Cleaner Clogged drains are a common household issue that can lead to slow water flow, unpleasant odours, and even damage to pipes if left unattended. While there are various methods to tackle this problem, one effective and less messy option is using a Wet & Dry Vacuum. What is a wet & Dry vacuum and why do you need one? Unlike traditional plungers or chemical drain cleaners, a wet & dry vacuum cleaner provides strong suction to remove blockages without the risk of damaging your pipes. Here’s a step-by-step guide on how to use this tool to unclog your drains. Step 1: Prepare your Wet & Dry Vacuum The key to successfully unclogging a drain with a vacuum is creating a good seal around the drain opening. We recommend the convenience kit which includes the suction cup to attach onto your wet & dry vacuum that fits snugly over the drain. If the vacuum’s hose or attachment doesn’t fit perfectly, use a wet cloth or duct tape to create an airtight seal. This is essential to build up enough suction to pull the blockage out of the pipes. Step 2: Apply the Suction Once the vacuum is ready, turn it on and apply suction to the drain. You may need to toggle between the vacuum’s suction and blower settings if the blockage is particularly stubborn. Start with suction to pull out debris like hair, soap scum, or other gunk that’s clogging the drain. If that doesn’t work, switch to the blower function to push the clog further through the pipes. Step 3: Check the Results After a minute or two of applying suction, turn off the vacuum and remove the nozzle. Check to see if water flows freely down the drain. If the water is still draining slowly, repeat the process until the clog is fully cleared. In many cases, a single attempt will be enough to dislodge common blockages. Step 4: Clean Up Once the clog is removed, thoroughly clean the vacuum hose and attachments, as they may have collected debris from the drain. Dispose of the waste properly, and wipe down the area around the drain to prevent further buildup. Unclogging drains with a wet & dry vacuum is a quick, efficient, and eco-friendly solution. It's perfect for common clogs like hair or debris, and it's a safer alternative to chemical drain cleaners.